# AutoFix for Bitbucket with Workspace Access Token
> When the installation of the Bitbucket Autofix integration does not work via the OAuth flow or you don't want to have it linked to a user in Bitbucket, you can also configure it to work with a Workspace Access Token (WAT).
### Go to PAT management page in Aikido
**First**, go to the PAT management page in Aikdo, which can be [found here](https://app.aikido.dev/settings/integrations/bitbucket/autofix/workspace-access-token).
**Next**, follow the instructions below to generate an access token in Bitbucket.
## Generate a "Workspace Access Token" in Bitbucket
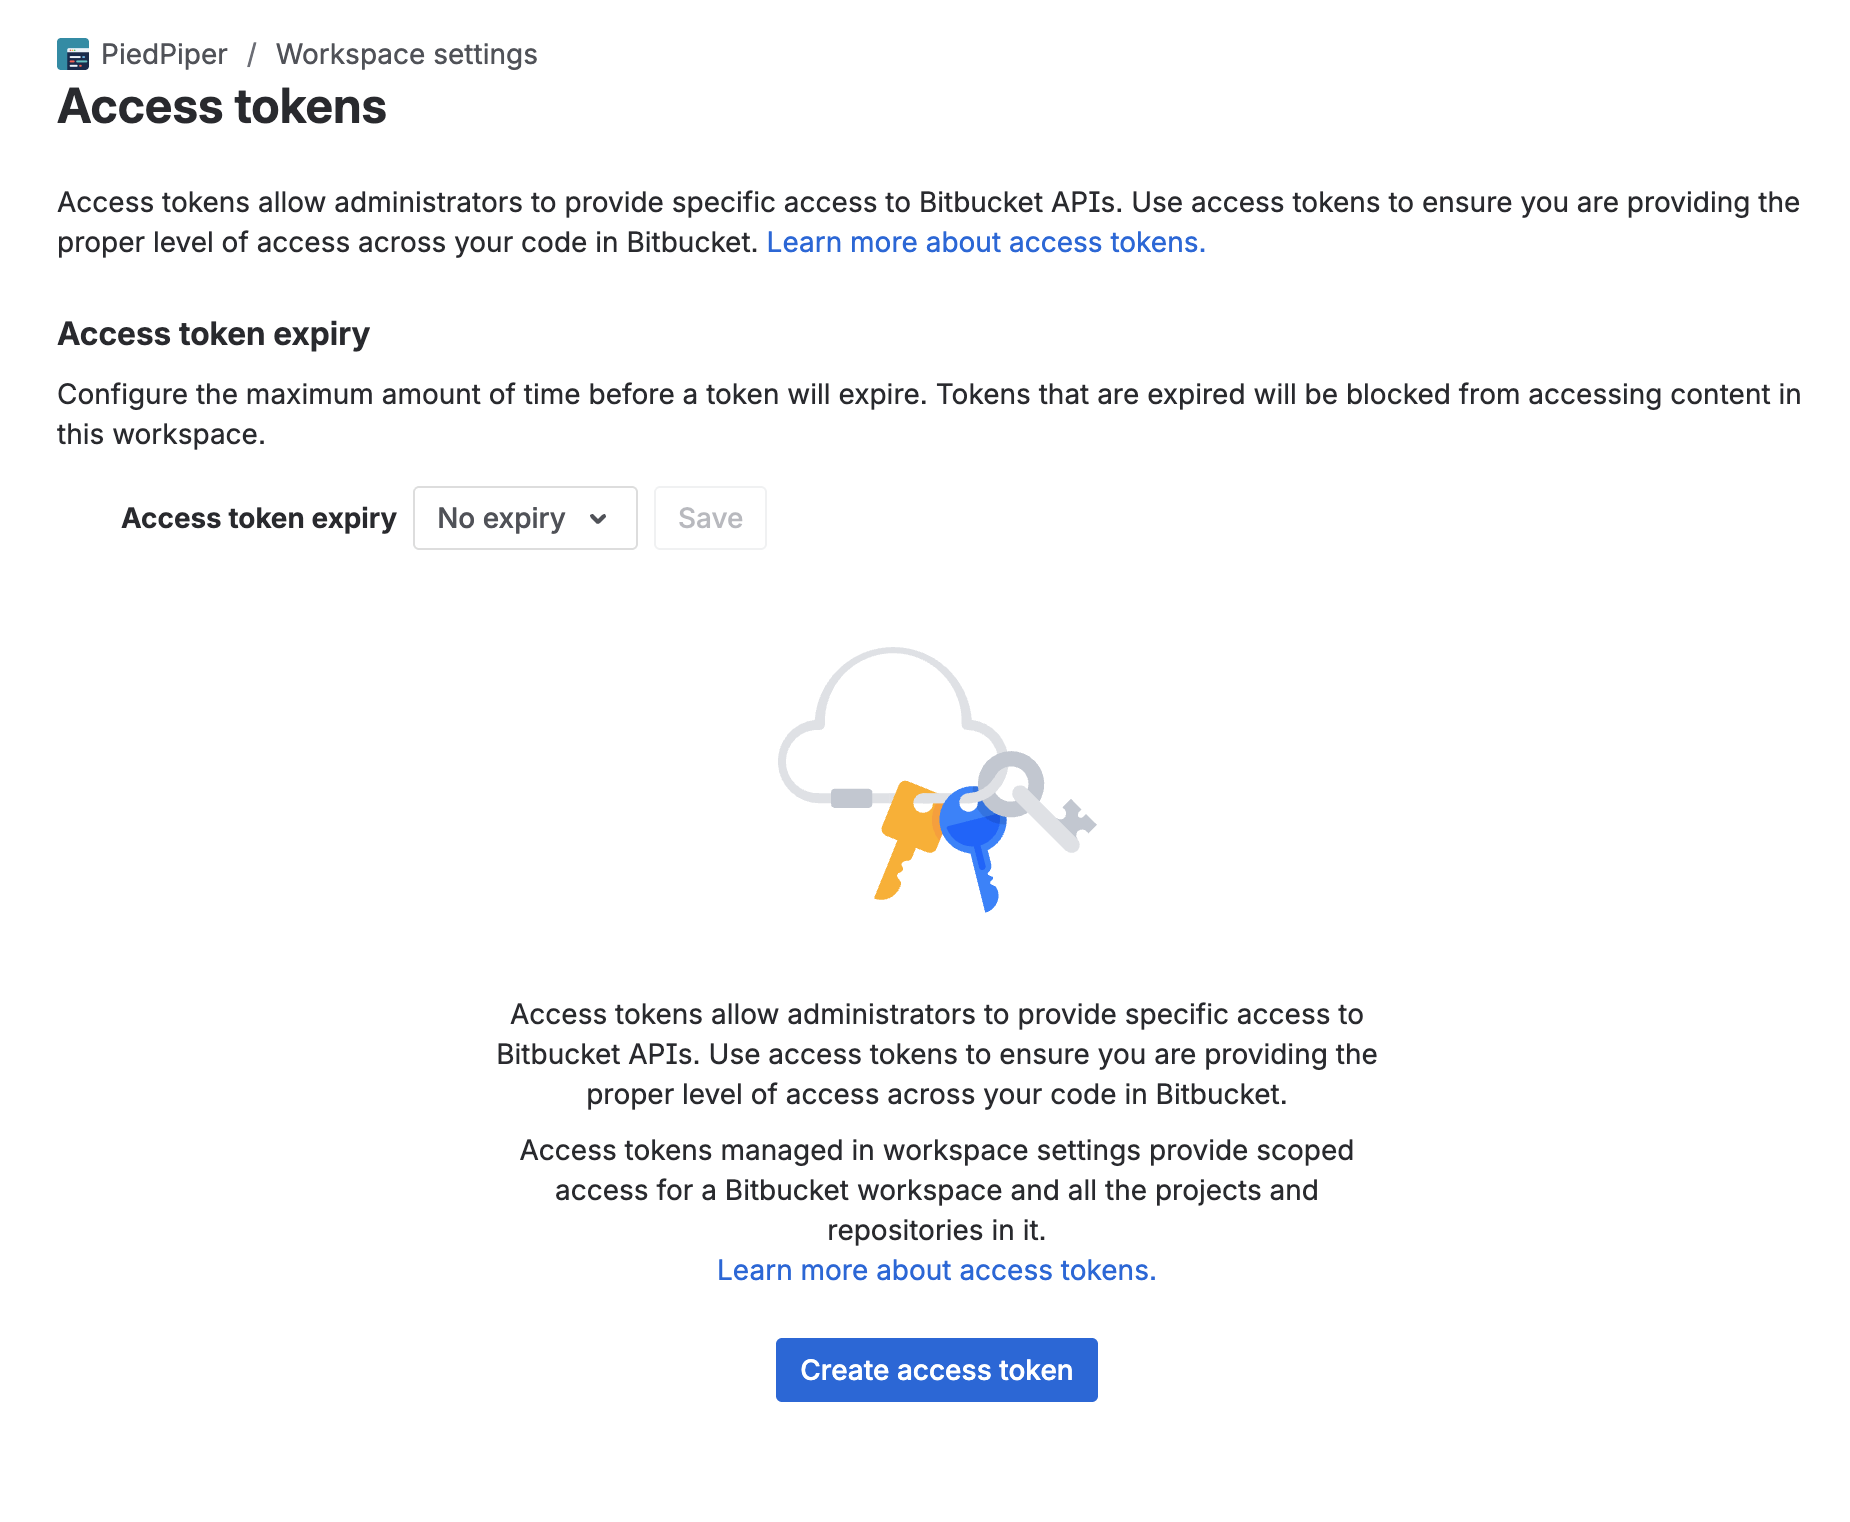
1. Navigate to '**Workspace Settings**' > '**Access tokens**', via the navigation of your Bitbucket workspace page
2. You should land on a page similar to this
3. Click on "**Create access token**"
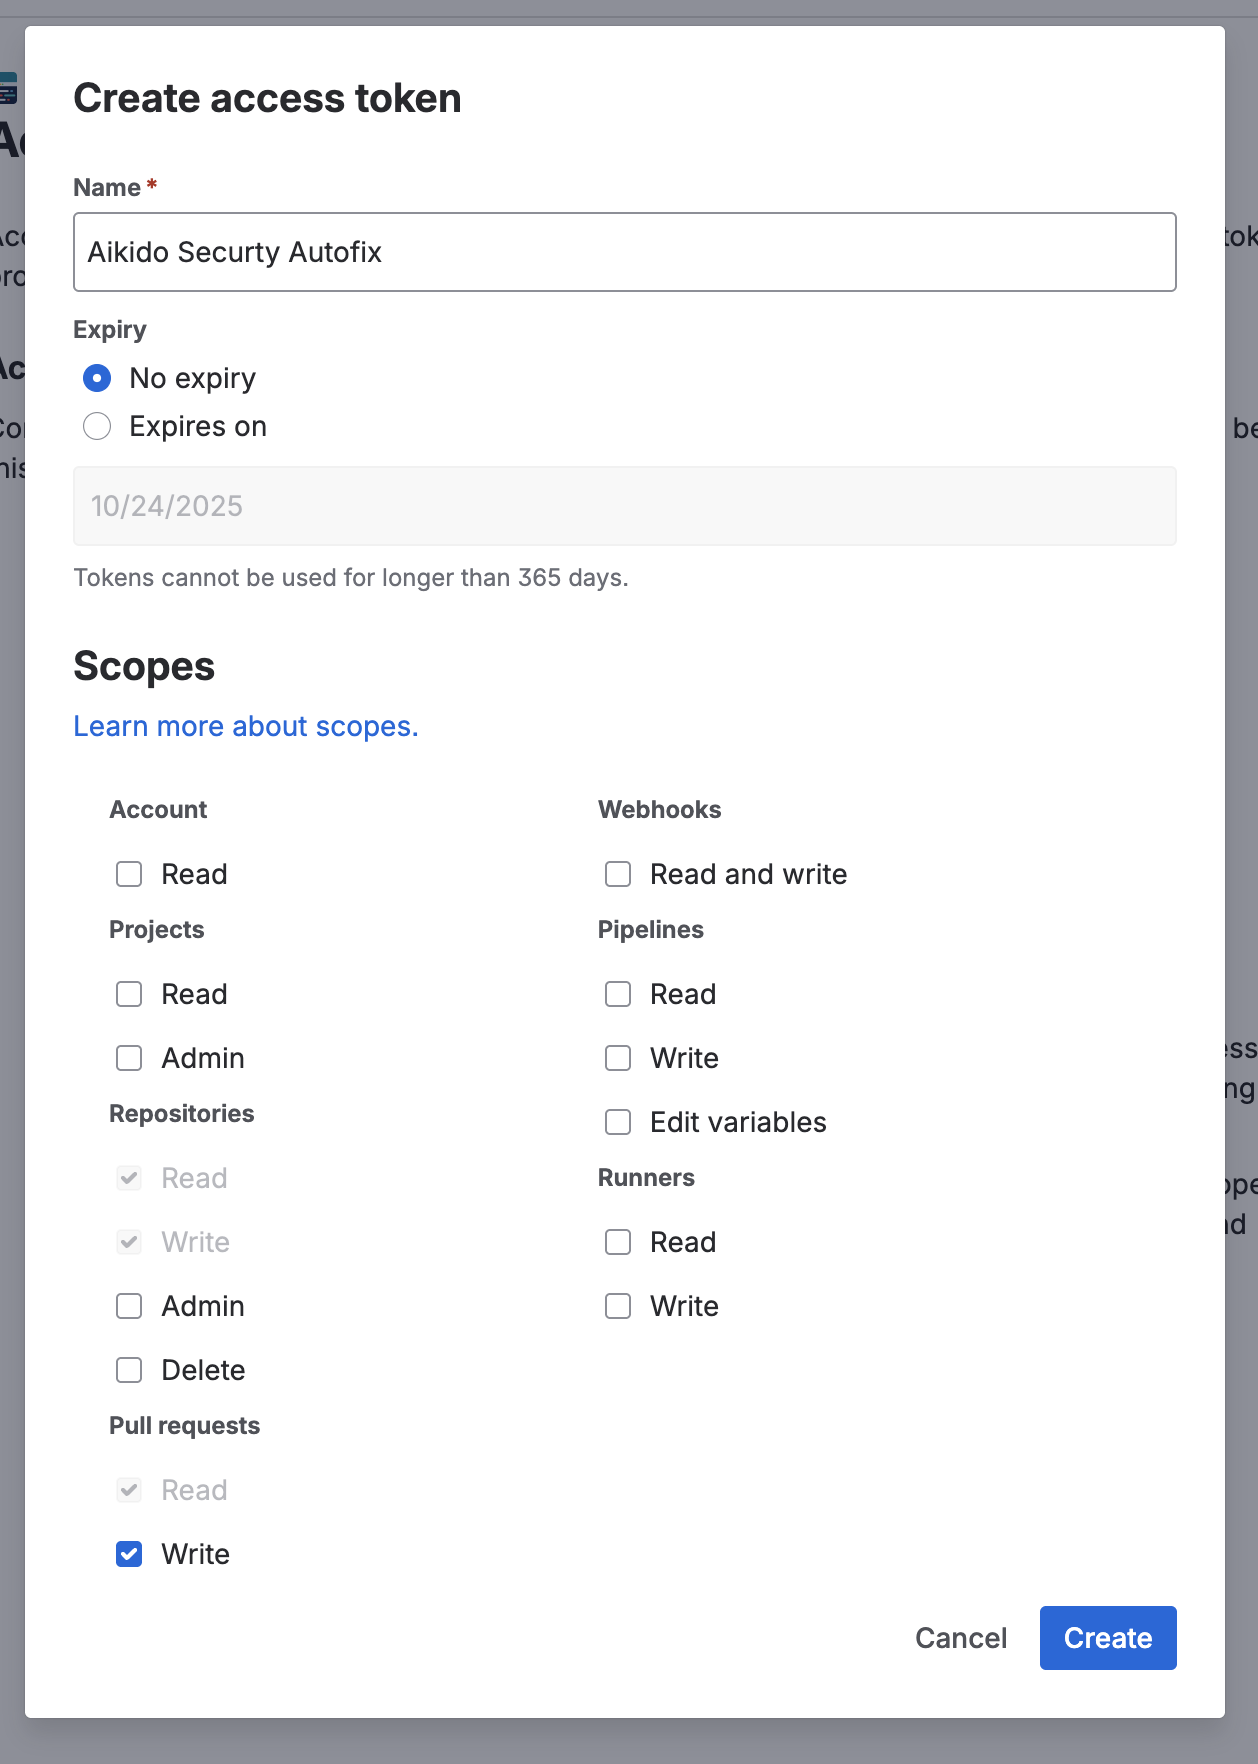
4. Enter a name for token, we suggest something like: "**Aikido Security Autofix**"
5. For the expiration, we recommend to select "No expiry"
6. Next you need to select the following permissions for the token: "**Repositories:write**" and **"Pull requests:write"**.
7. The access token configuration modal should look like this
8. When you are done, click on "**Create**"
9. Copy the token on the next screen and insert it on the personal access token management page in Aikido.