# Signed Commits
Aikido supports signed commits for **GitHub**, **GitLab**, **Bitbucket Cloud** and **Bitbucket Data Center** to ensure the authenticity of code changes. While GitHub requires no configuration, GitLab and Bitbucket users must add a specific Aikido-provided SSH key to their account.
## Why use signed commits?
Signed commits provide a layer of cryptographic assurance, proving that code changes originated from Aikido and haven't been altered. This is essential for:
* **Identity Verification:** Guarantees that the commit was actually made by the authorized service.
* **Trust & Security:** Prevents "commit spoofing" where a malicious actor pretends to be a trusted contributor.
* **Audit Readiness:** Helps satisfy security compliance frameworks like **SOC2**, **ISO 27001**, and **HIPAA**.
## Setup
### GitHub
**No configuration required.** GitHub automatically recognizes and signs commits made via the Aikido integration. These will appear with a **"Verified"** badge in your commit history immediately.
### GitLab
To enable signed commits on GitLab, you must use **Personal Access Token (PAT)** authentication; this feature is not available via OAuth.
**Important Note on Users:** GitLab only supports signed commits for **real user accounts**, not service accounts. The PAT used in Aikido must belong to a real user.
Setup steps:
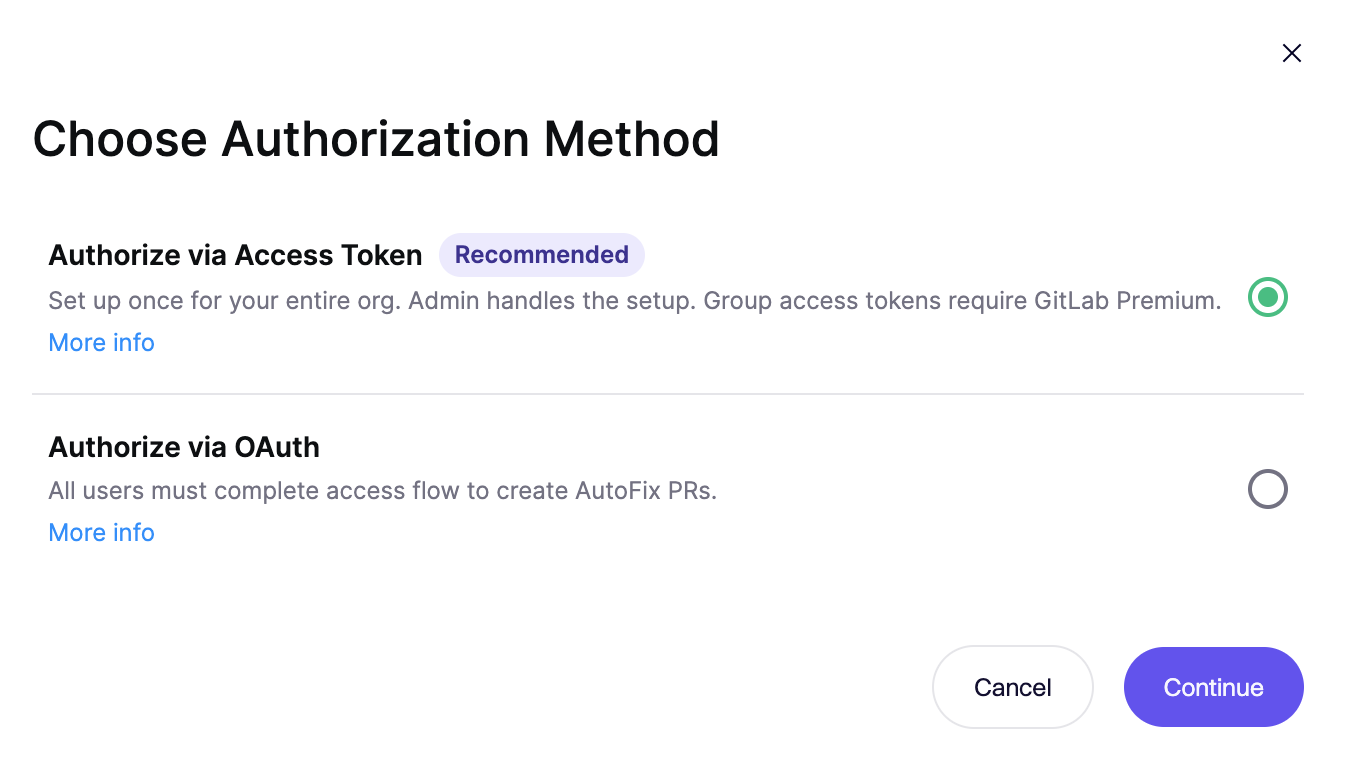
1. **Navigate to Settings:** In Aikido, go to the [**AutoFix settings** page](https://app.aikido.dev/issues/fix/settings) and click **Authorize** (on initial setup) or **Manage Personal Access Token** (when a token is already set).
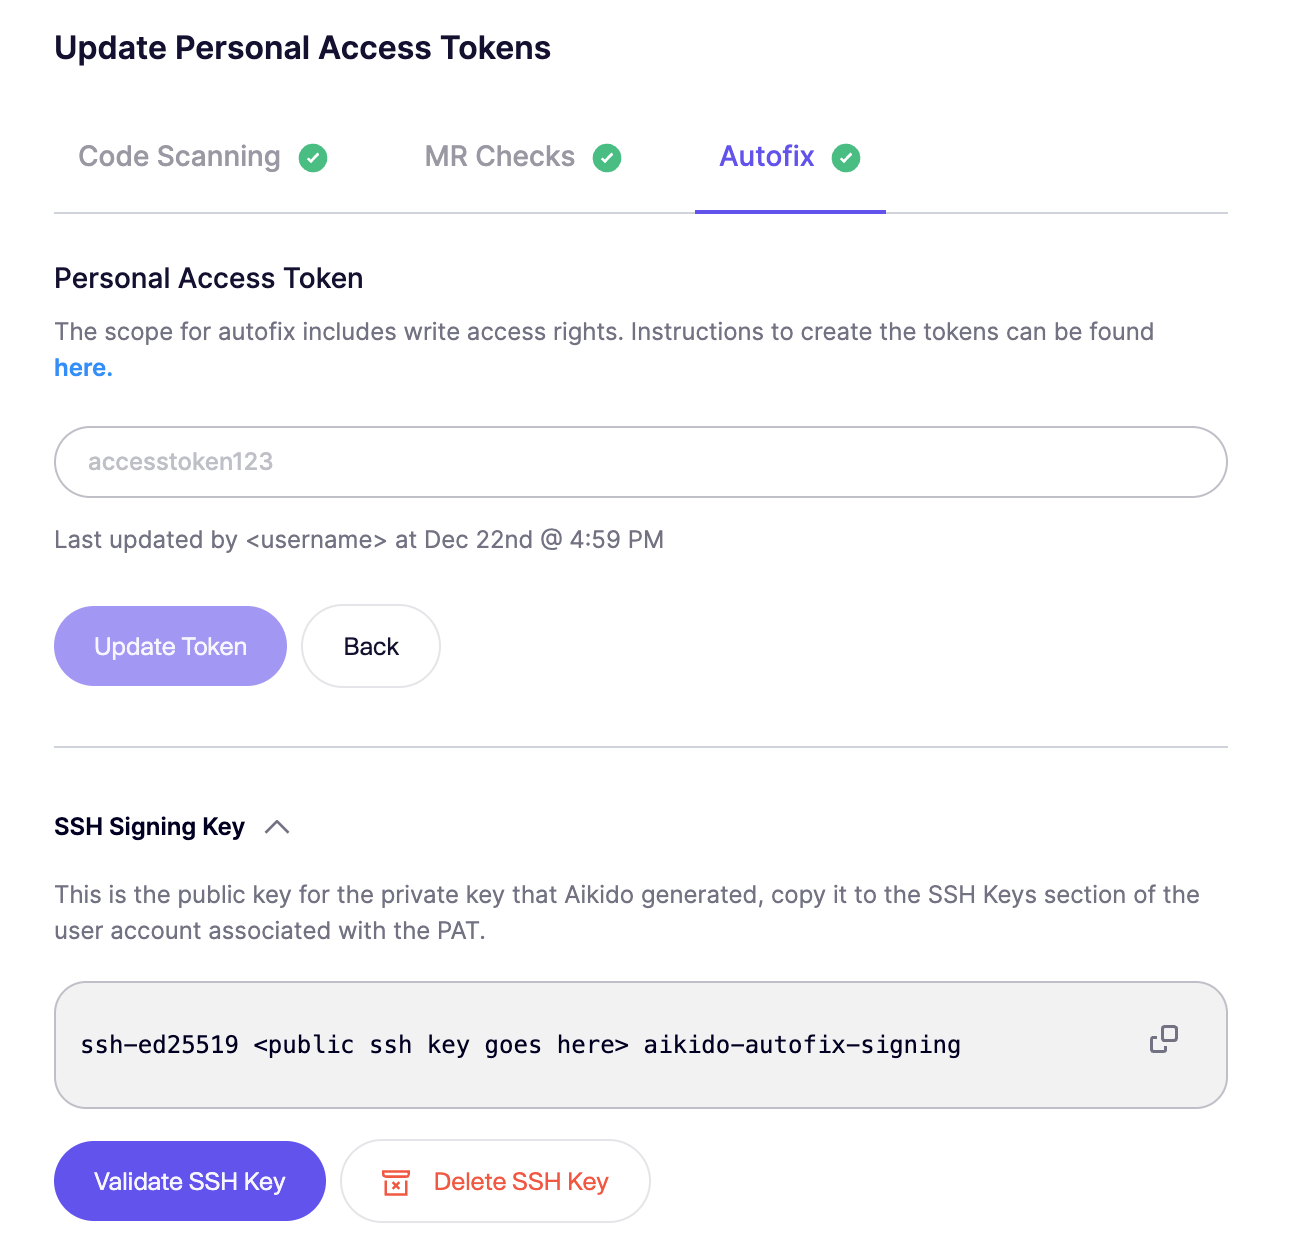
2. **Configure the PAT:** Enter the Personal Access Token you generated in GitLab's User Settings in Aikido.
3. **Generate SSH Key:** Click **Generate SSH key** within Aikido to create your unique signing key.
4. **Add to GitLab:**
* Copy the public key provided by Aikido.
* In GitLab, click the **User icon** on the top right **> Edit profile > SSH Keys > Add new key**
* Paste the key and ensure the **Usage type** is set to **"Authentication & Signing"**.
5. **Validate:** Return to Aikido and click **Validate SSH key** to confirm the connection is active.
You will now see the `Verified` badge on the commits from Aikido:
Aikido creates a unique SSH key for each account, this SSH key can be recreated by clicking `Delete SSH Key` and creating a new key.
### Bitbucket Cloud
Signed commits on Bitbucket Cloud require [AutoFix with a Workspace Access Token](https://help.aikidogov.us/autofix-and-remediation/configure/autofix-for-bitbucket-with-workspace-access-token). The SSH key must belong to a real user, and the commit email must be a verified email of that user in your workspace.
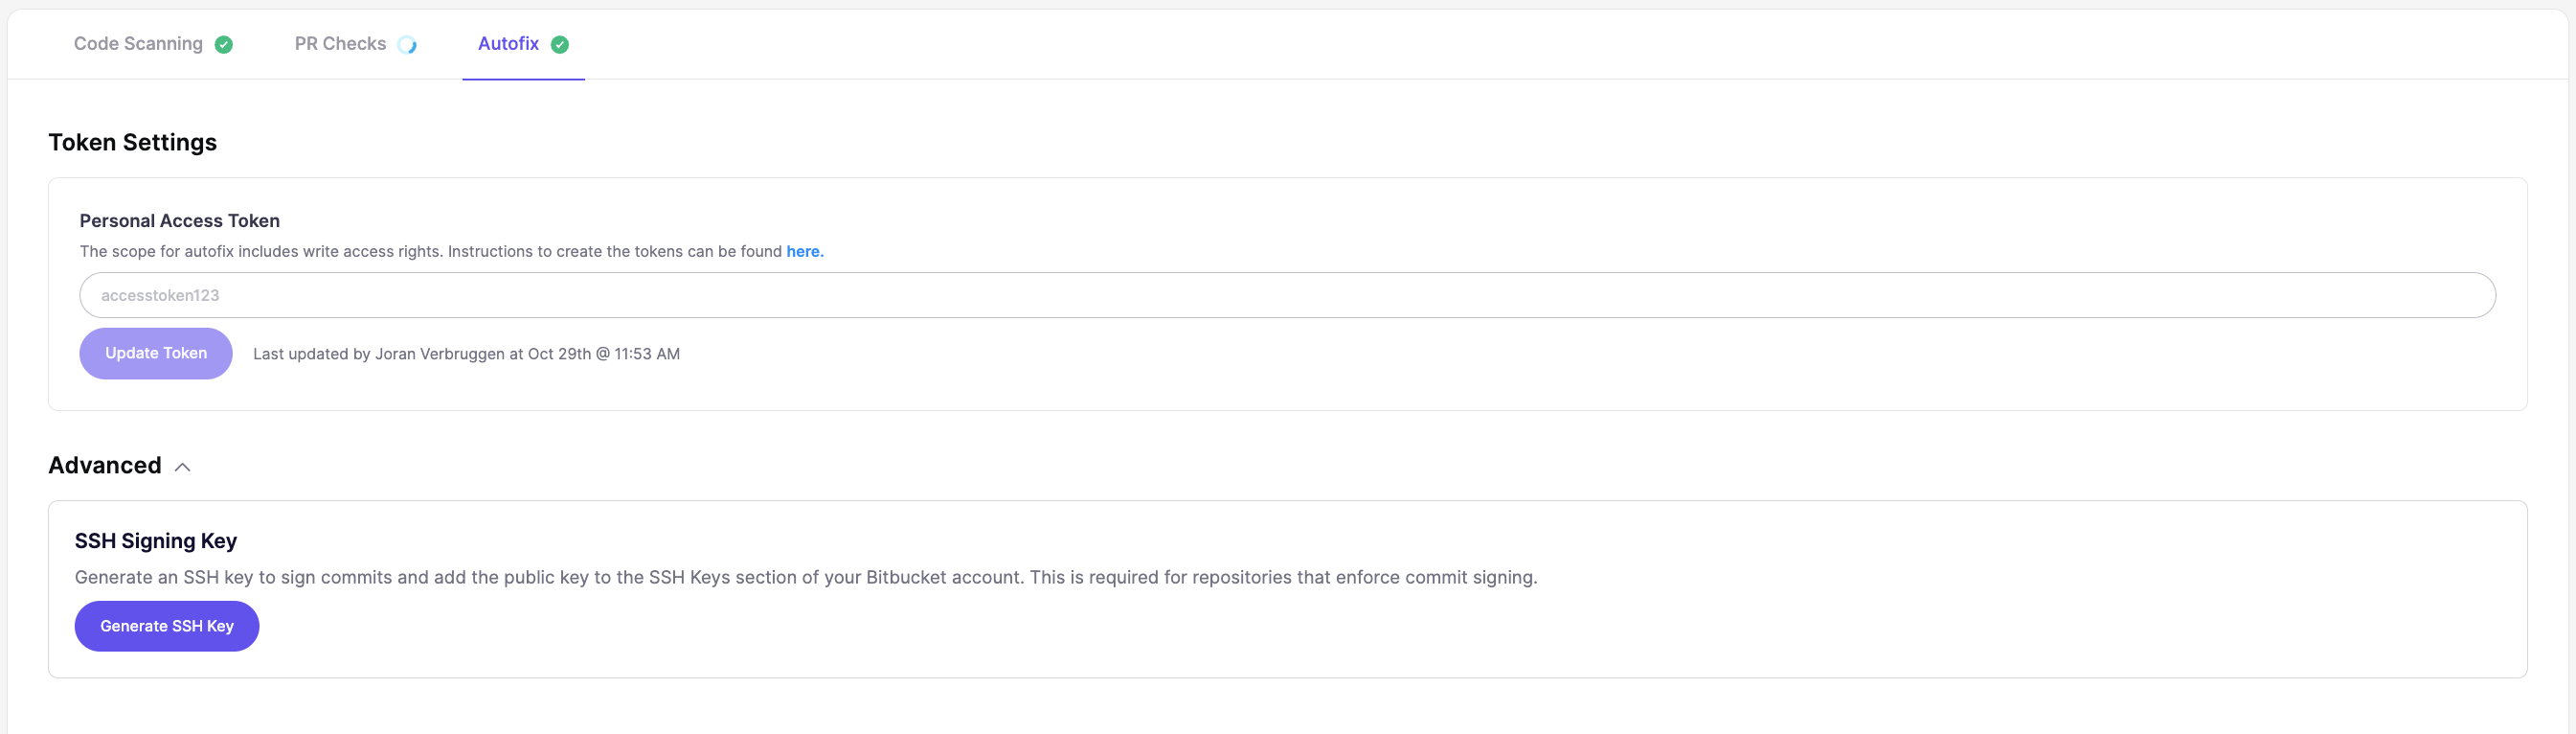
1. **Navigate to Settings:** In Aikido, go to the [**Update Workspace Access Token** page](https://app.aikido.dev/onboarding/bitbucket/update-workspace-access-token) and open the **AutoFix** tab.
2. **Set the commit email:** In Aikido, enter the email address of the Bitbucket user that will own the SSH key.
3. **Generate SSH Key:** In the **Advanced** section, click **Generate SSH Key**.
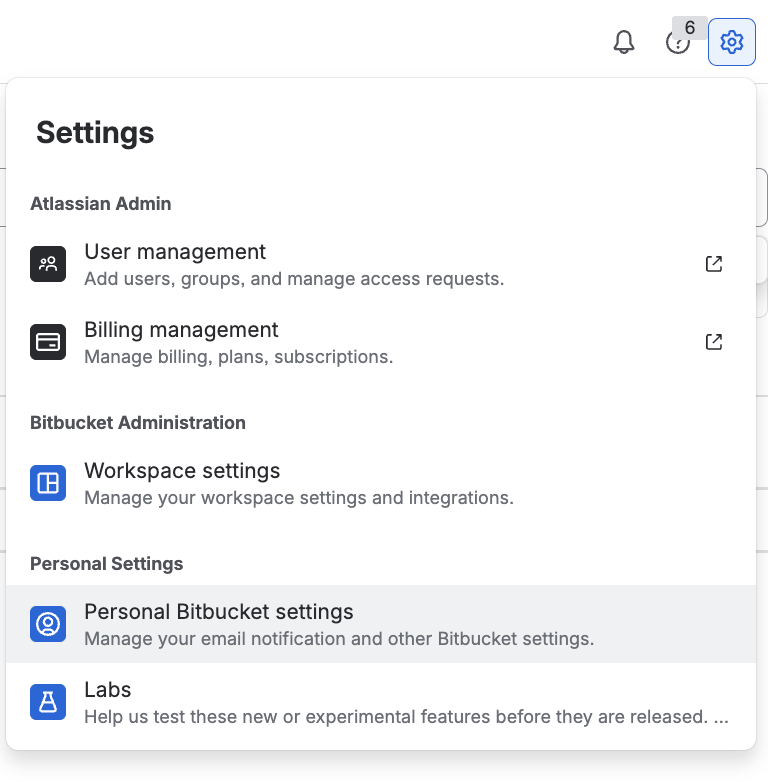
4. **Add to Bitbucket:** Copy the public key provided by Aikido. In Bitbucket, click the **Settings** icon on the top right **> Personal Bitbucket settings**, then go to **Security > SSH keys > Add key** and paste the key.
You will now see the `Verified` badge on the commits from Aikido.
### Bitbucket Data Center
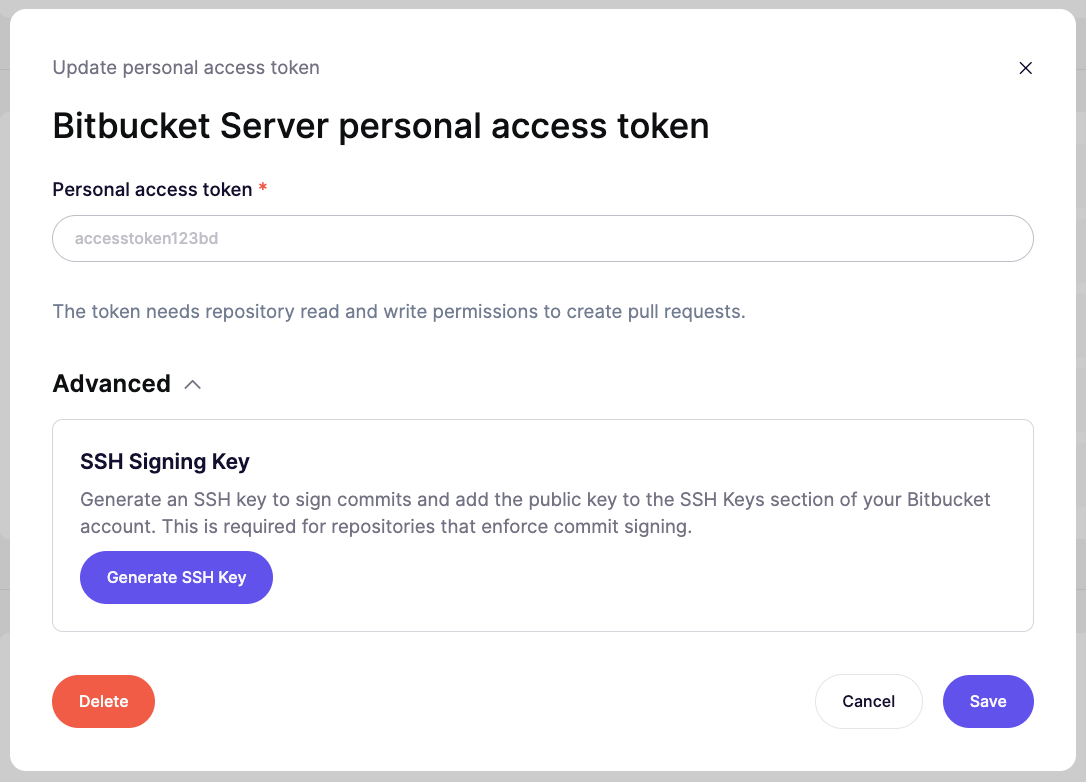
1. **Navigate to AutoFix Settings:** In Aikido, go to the [**AutoFix settings** page](https://app.aikido.dev/issues/fix/settings) and click **Manage Personal Access Token** for Bitbucket Data Center.
2. **Set the commit email:** In Aikido, enter the email address of the Bitbucket user that will own the SSH key.
3. **Generate SSH Key:** In the **Advanced** section of the modal, click **Generate SSH Key**.
4. **Add to Bitbucket:** Copy the public key provided by Aikido. In Bitbucket Data Center, go to **Profile > Manage account > SSH keys > Add key** and paste the key.