
ASP.NET Core
This guide will walk you through installing and setting up Zen Firewall by Aikido for your application. Follow the steps below to protect your application.
If you encounter any issues or problems, don't hesitate reach out on support chat or Github issues
https://github.com/AikidoSec/firewall-dotnet
Requirements
- C#/.NET 6+ (tested up to .NET 10).
- ASP.NET Core 6.0+.
- Aikido account & Zen Firewall token
Installation & Configuration
Install Zen Firewall by Aikido
Ensure your project runs on .NET 6, 7, 8, 9, or 10. Additionally, your application must use endpoint routing (
UseRouting) so Zen Firewall can resolve route information correctly. Legacy routing middleware such asUseMvcis not supported. See the ASP.NET Core migration guide here.Install the package from NuGet:
dotnet add package Aikido.Zen.DotNetCoreConfigure your token in
appsettings.json(or setAIKIDO_TOKENas an environment variable):{ "Aikido": { "AikidoToken": "your-api-key" } }Enable Zen in your startup configuration:
Program.cs using Aikido.Zen.DotNetCore; using Microsoft.AspNetCore.HttpOverrides; public void ConfigureServices(IServiceCollection services) { // other services services.AddZenFirewall(); // other services } public void Configure(IApplicationBuilder app) { // Make sure to allow x-forwarded-for header if your app is behind a proxy app.UseForwardedHeaders(new ForwardedHeadersOptions { ForwardedHeaders = ForwardedHeaders.XForwardedFor | ForwardedHeaders.XForwardedProto }); // other middleware // app.UseRouting() // place this after .UseRouting(), or after authorization, // but high enough in the pipeline to catch all requests app.UseZenFirewall(); // other middleware like app.UseEndpoints() or app.MapControllers() }Enable User Identification & Blocking
Use this middleware to identify the current user and enable user based features such as user blocking.
Zen Firewall does not require this middleware to block attacks. Core attack protection works without it. Add this middleware when you want Zen to recognize which user is making the request.
Adapt the example to match how your application identifies users.
Program.cs // authentification middleware app.Use((context, next) => { // unique id for the user var id = context.User?.Identity?.GetUserId(); // name (optional) var name = context.User?.Identity?.Name; if (!string.IsNullOrEmpty(id)) Zen.SetUser(id, name, context); return next(); }) app.UseZenFirewall(); // place this after UseRouting // other middleware like UseEndpoints() or MapControllers()Start Zen Firewall in dry / detection-only mode
Set the token as an environment variable so the Aikido Zen agent can pick it up. If you don't have a token yet, follow instructions here.
AIKIDO_TOKEN=AIK_RUNTIME_We recommend to start your app in dry mode to ensure it works as expected without blocking any requests. We advise running Zen Firewall in staging for two weeks to avoid false positives.
AIKIDO_BLOCK=falseYou can use
AIKIDO_DEBUG=trueto enable debug mode for more detailed information about what the agent is doing. For more information about your environment variables: configuration-via-environment-variables.mdTest your app
Browse to your application and perform a couple of actions or open a couple of pages. Zen will automatically discover the routes in your application.
Zen sends data back to Aikido every 10 minutes
You can verify a working agent by looking at the following pages of your Zen application:
- Events: Should show an "Application started" event.
- Routes: After some time your application routes will start showing here with the method, route and requests.
- Instances: Should show the number of active instances for your application where Zen is installed.
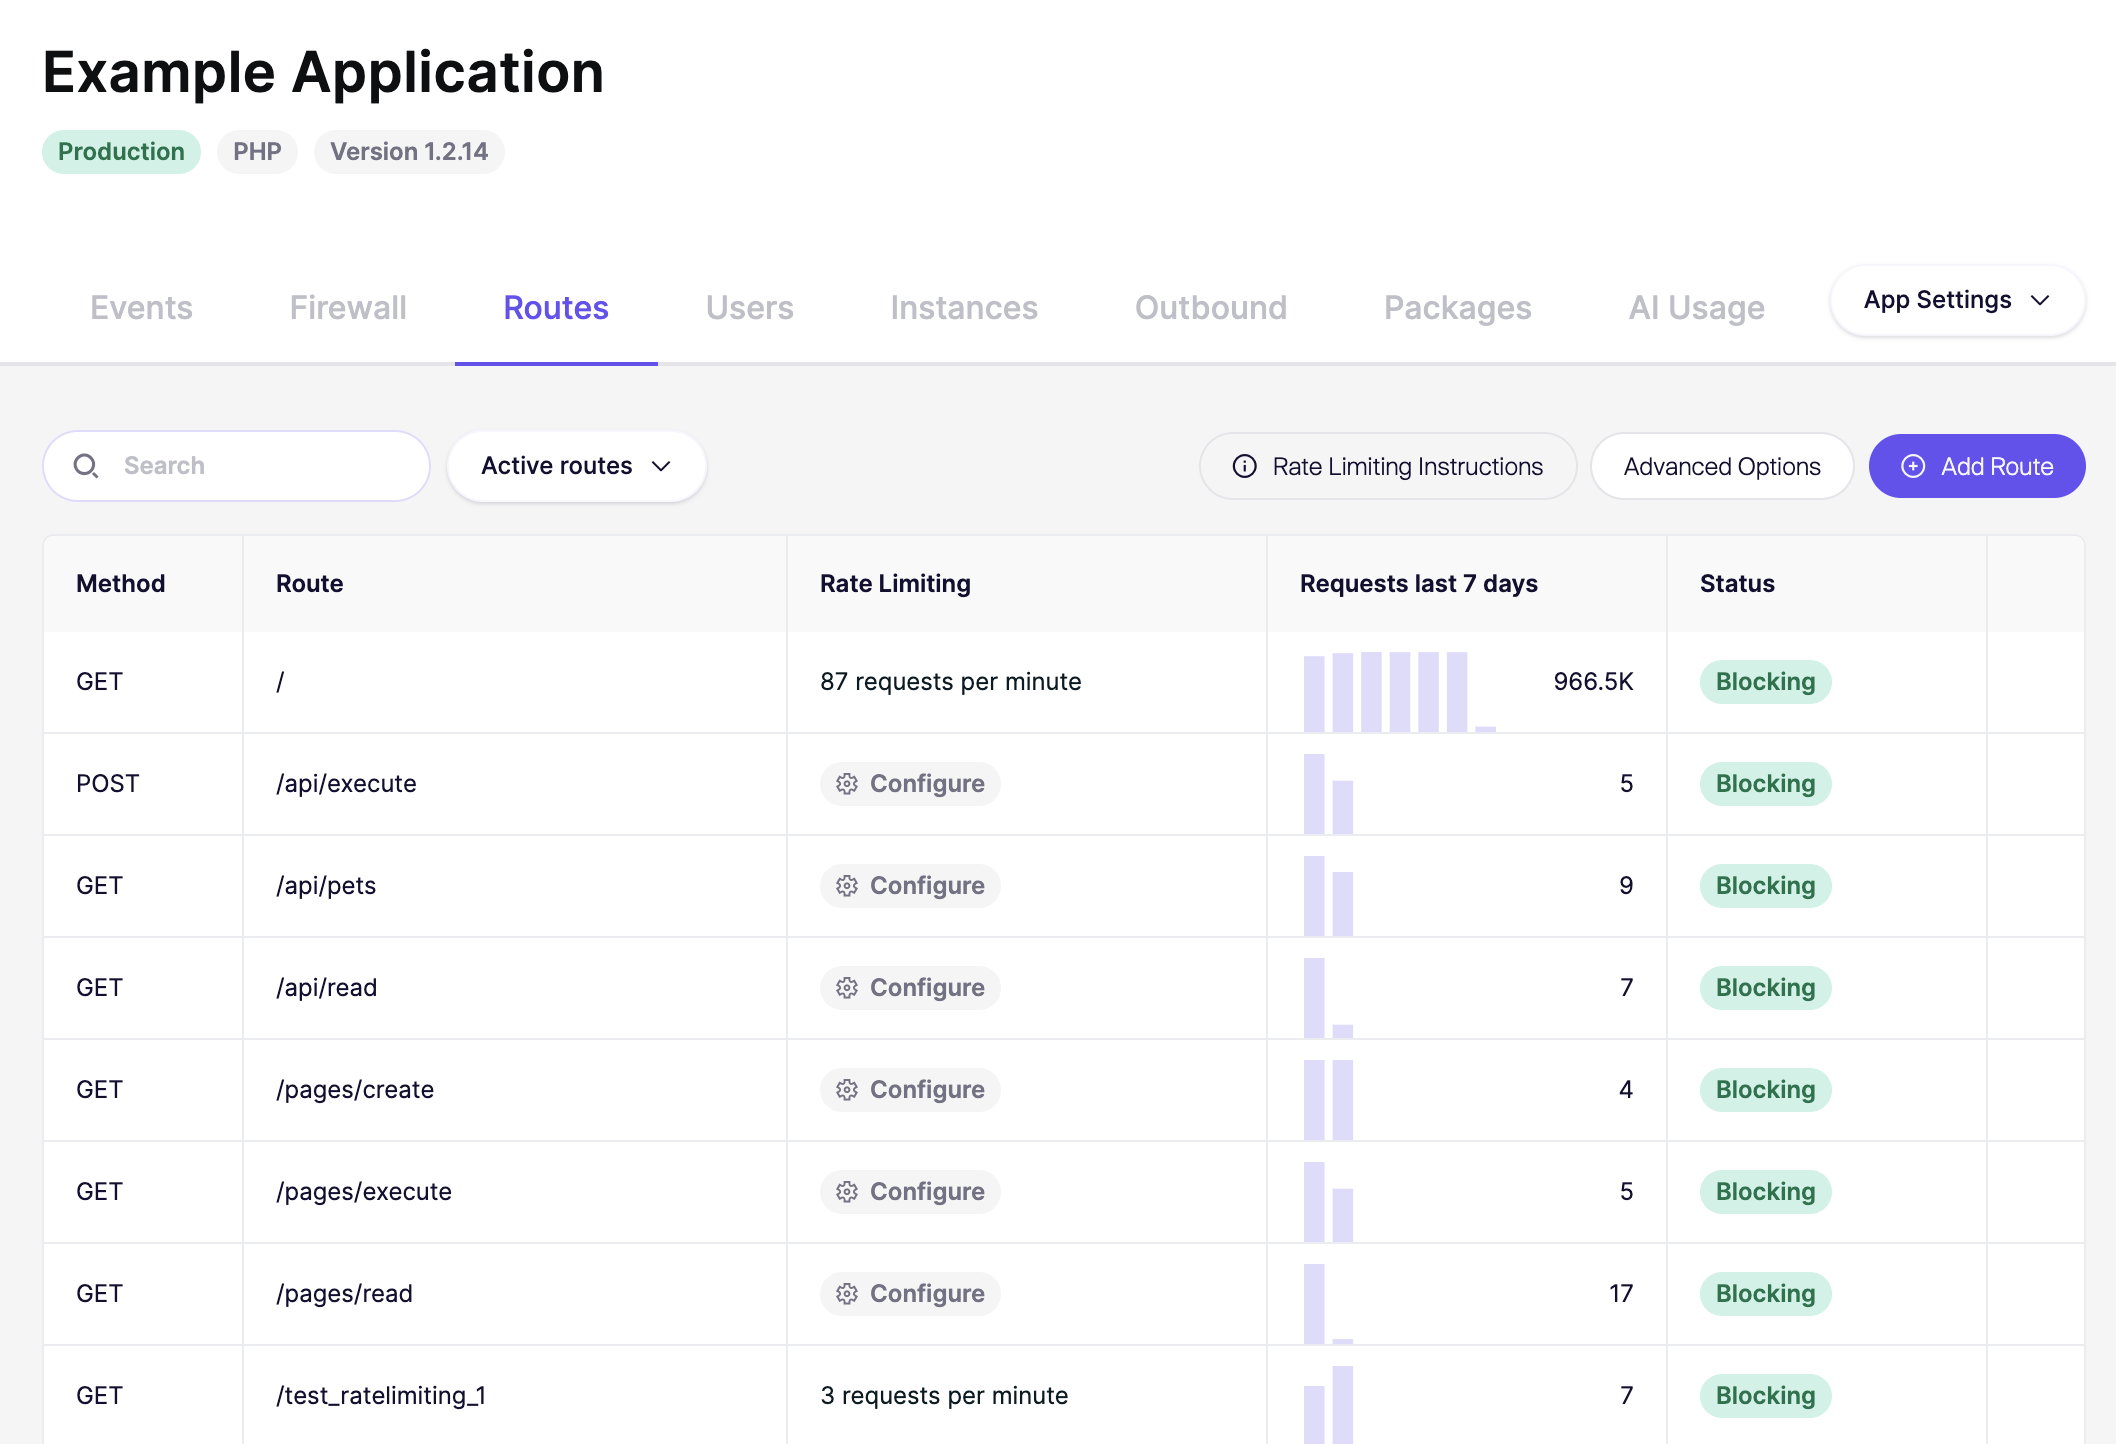
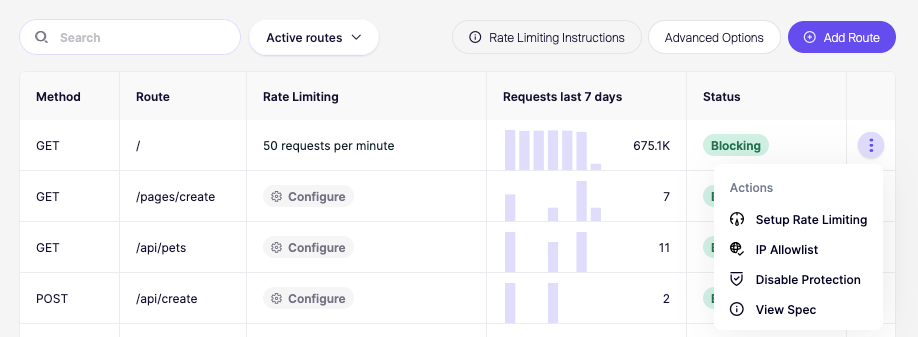
Setup rate limiting in the dashboard
When you've added the Zen Firewall middleware you can test protecting a route from brute force attacks, you do this by setting up rate limit in the Aikido Dashboard:
- Click on the created app.
- Go to the Routes tab.
- Find the route you would like to limit and click Setup rate limiting.
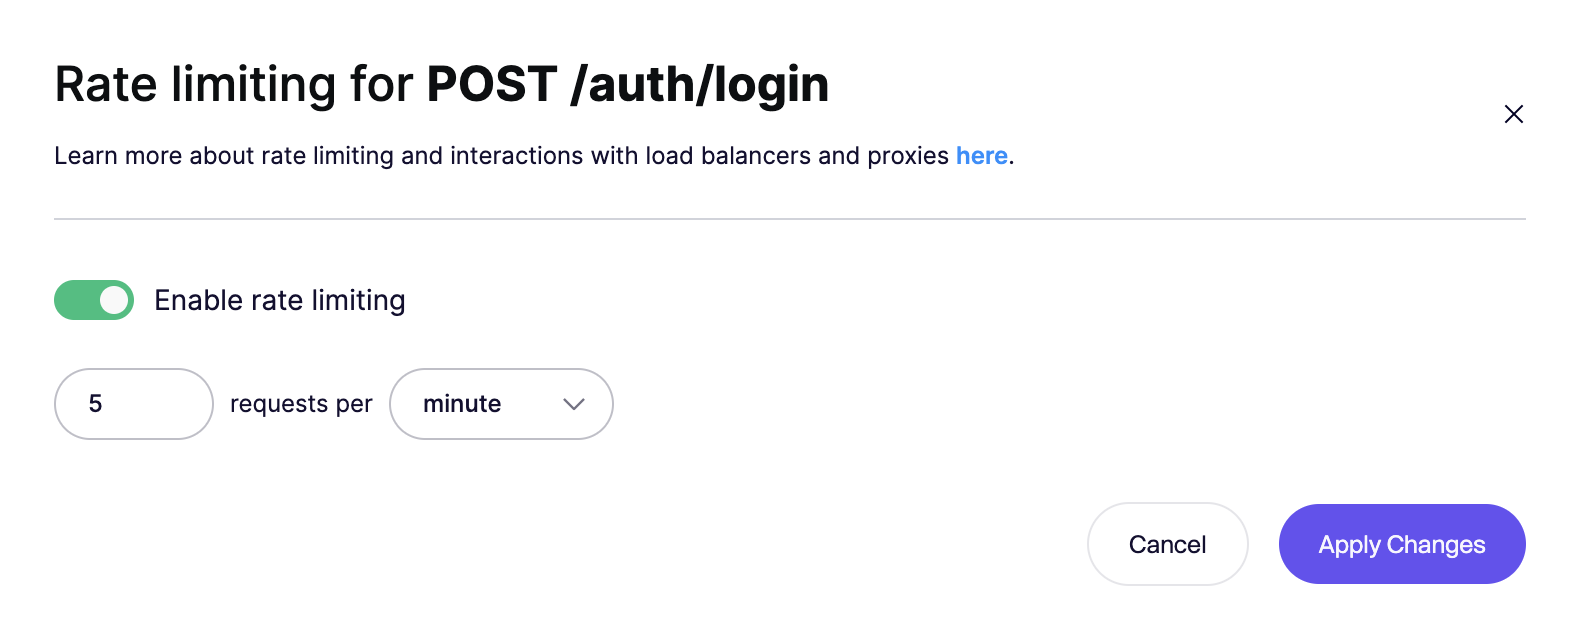
- Follow the instructions to configure the rate limit (e.g., 5 requests per minute).
Verify Rate Limiting
Start your app and try to access the route you've rate limited 5 times within a minute. After the fifth attempt, you should receive a rate limit error:
You are rate limited by Aikido firewall. (Your IP: 1.2.3.4)Next steps
Congrats you've successfully installed Zen Firewall. If you encountered any problems, have concerns or feature requests, don't hesitate to reach out to support.
You can now go and explore the many features that Zen Firewall provides:
- blocking-bot-traffic-with-zen-firewall.md
- blocking-tor-traffic-with-zen-firewall.md
- blocking-users-with-zen-firewall.md
- blocking-known-threat-actors-with-zen-firewall.md
- blocking-traffic-by-country-with-zen-firewall.md
- setting-up-rate-limiting-for-routes.md
- monitor-outbound-domains.md
Additional information: